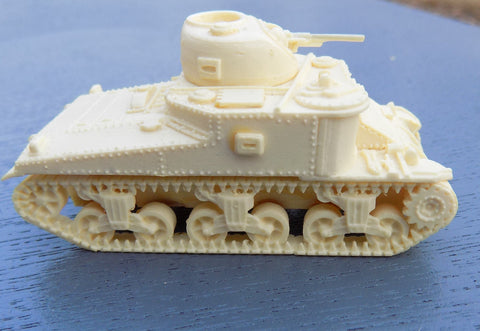
Many people don't build resin models because they are intimidated by the material. Many people seem to think there is some secret alchemy going on and that resin is the realm of the master modeller. Only the most expensive and difficult kits are made in resin and the average modeller could never hope to succeed in building one, or not.

Using the same sort of tools you use for a styrene model kit you can build most resin kits. An X-Acto knife with #11 blade, a sanding stick or very fine sandpaper, a sprue cutter, cutting board all usually all you need. Depending on the kit, a pin vise and tiny drills can be helpful to drill out holes for machine guns or radio antennas. Sometimes a heavier knife is helpful, or various other grades of sanding sticks or sand paper, and maybe tweezers if there are little bits.

I like to use a five minute epoxy glue, sold in most hobby shops, similar glues are sold in most hardware stores, or even Target stores. I like the five minute because you don't have to hold it very long. Superglues work well too, but I think the epoxy is more gap filling and holds a stronger bond. In either case, just use a little bit of glue evenly spread on the surface to glue.

Resin kits often have lots of excess resin to trim off. Don't let this worry you. It is just like the excess plastic on regular kits and it actually trims off much easier than the extra plastic on soft plastic figures. I cut the bit parts, if any, with the sprue cutter. I then trim the rest down with the knife blade. Finally a brush of the sanding stick just to smooth things out. Since I don't see well close up, I like to use a magnifying glass to inspect my work. I actually wear one of those visor things. For $10 you can get one at Harbor Freight Tools or similar places. Don't spend a lot of money one.

One of the best things about resin kits is the tracks are usually one left side part and one right side part. So much easier than most model kits. Usually there is a bit of flash between the road wheels. Since this assembly will be glued to the side of the hull only part of the flash really needs to be removed. The part of the tracks that is below the lower hull should be cleaned out with your X-Acto knife, the rest you can leave in.

Paul Heiser Panzer II and US Army Jeep below.


Many resin parts are made with an open face, single part mold. This can leave a very glossy smooth surface, usually on the back or underside of the parts. These halftrack suspension pieces need a quick brush of the sanding stick to rough up that very smooth surface. A rough surface will create a texture for the glue to stick to and make a more durable model.


